DIY Scene Design and 3D Modeling
Led by Daniel Lichtman
November 22, 2020
Working in Unity is hard. 3D modeling is involved, and it’s hard to be quick and nimble when you’re trying to do it (at least if you’re me). AAA-style textures are damn near impossible (and who wants to go down that road anyway). So how do you make a compelling looking 3D environment without superhero skills?
This workshop introduces a range of “DIY” techniques in Unity to quickly make exciting, rich and layered 3D environments, no coding or specialized game-dev skills required. We will go through simple techniques for adding hand-drawn and flat, photo-based objects to your scene. We’ll demonstrate how to scan drawings and turn them into transparencies that, with a little (really only a little!) creativity, can fill your 3D space with fun, organic texture. We will also demonstrate how to take 360-degree photos with any phone, and use these as compelling, if often strange and disorienting skyboxes. Finally, we’ll go over how to fiddle with freely-available 3D models to turn them into mysterious, alluring objects to navigate in your scene.
No prior experience in Unity required to follow this workshop! Though some experience will help a lot in being able to follow the steps in this document.
This workshop is based on my project, The Community Game Development Toolkit, a set of tools that make it easy and fun for students, artists, researchers and community members to create their own visually rich, interactive 3D environments and story-based games without the use of coding or other specialized game-design skills. More info here: https://www.daniellichtman.com/toolkit/
Unity -- very very basics
Install Unity
- Click Get Started, follow directions to create individual account
- From ID menu choose Download Unity
- Choose Download Unity Hub
- Follow Licensing Process
- Click Installs. Click Add
- Download 2019.4.18f1 (LTS). Note: this is the version we used during the workshop. Feel free to use a more recent version. I recommend using LTS -- long term release versions
- Choose these modules when you install: -Visual Studio for Mac/Windows -WebGL Build Support
Unity Interface
- Hierarchy: Shows organization of objects in a scene
- Toolbar: Tools to control our view of the scene and manipulate objects in the scene
- Scene view: where we modfiy the scene
- Game view: where we run / play the scene
- Inspector
- Can manually enter properties of objects such as Transform info
- Manage object components
- Project
- View and manage Assets
- Message bar (bottom of screen)
- See debug data
Navigating your Scene

Reference: https://docs.unity3d.com/Manual/SceneViewNavigation.html
- Press Hand Button on top left tool bar -- move camera around
- Press Option or Use right mouse button to orbit camera
- Scroll / Scroll wheel to zoom
Fly through mode:
- Hold right mouse button
- Use WASD
Using drawings and photos to create transparencies and interesting textures for your scene
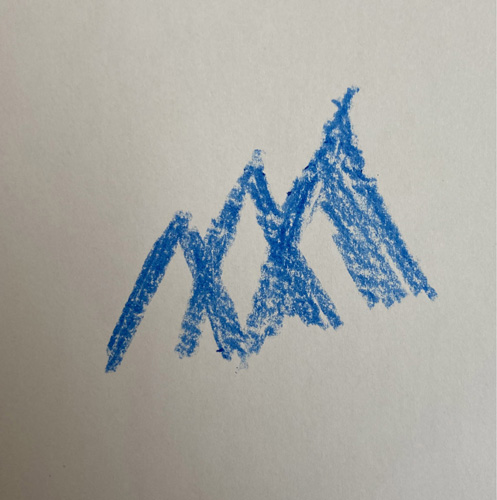
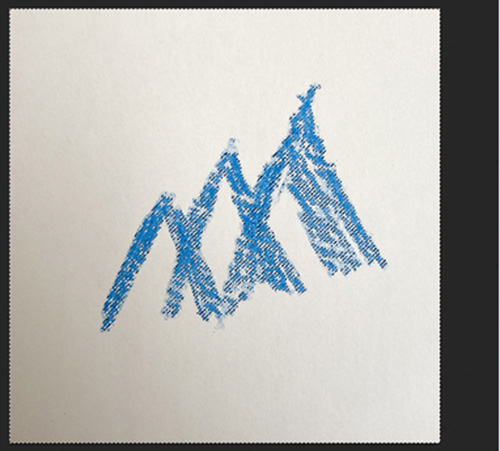
Crayons are fun!
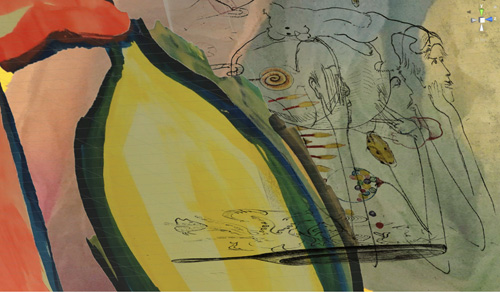
Make a drawing and take a photo of it. Try to take photo with even background light. Better yet, scan your drawing. Here is an example:
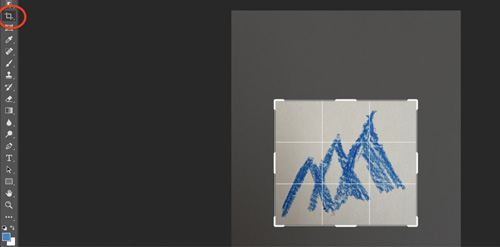
Open in Photoshop
- Open your image in Photoshop
- Crop using the Crop Tool:
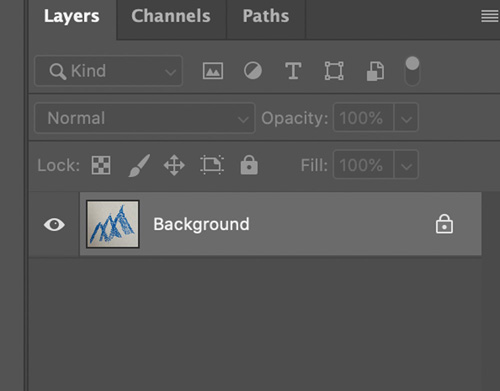
- Double click Background Layer to turn it into a regular Layer.
Before:
After:
Adjusting your image in Photoshop to make it easier to make a selection
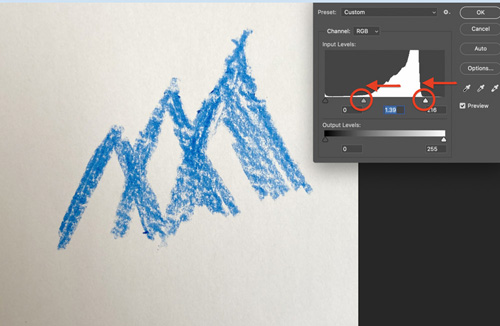
Open your image, and from the menu bar choose Image -> Adjustments -> Levels. Fool around with these markers to make your drawing stand out from the background:
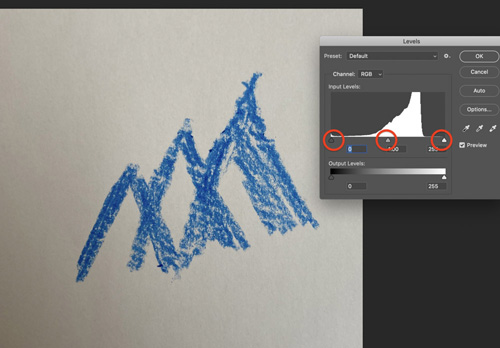
Usually it helps to move the right most marker inwards to make bright parts brighter, and the middle marker to the left to increase contrast:
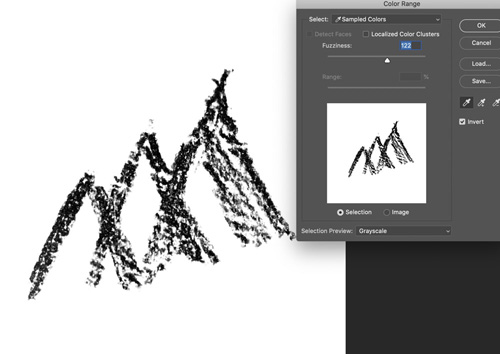
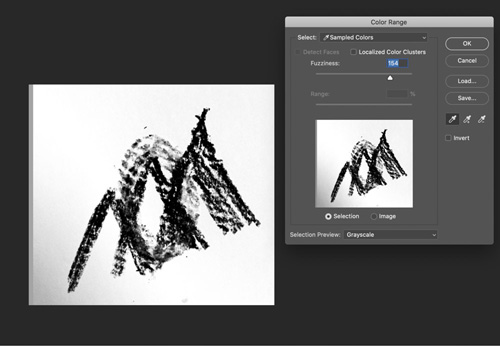
Make a selection using the Color Range Tool
- From menu bar choose Select -> Color Range.
- Check ‘Invert’
- Use the eye dropper tool to click in your drawing.
- The black areas in the previews are your selection
- Try clicking on different locations to see what creates the best result. Also fool around with the Fuzziness slider.
- When done, press OK. (now, the background will be selected--you’ll see why in a minute)
Now you should have something that looks like this, showing your selection:
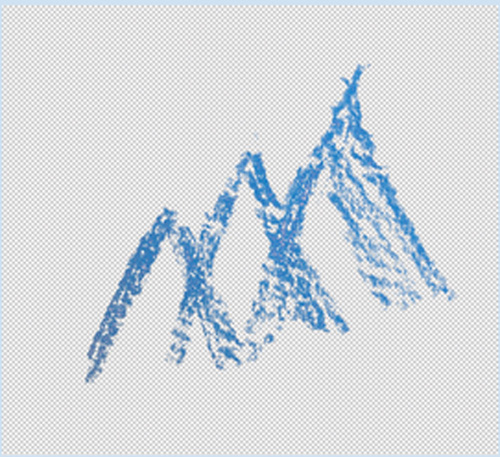
Press delete to delete the selected background. You should see checkerboard background, indicating transparent areas:
Saving as a Transparent PNG
- In the menu bar go to Image -> Image Size. Make your image about 1500 pixels in the maximum dimension.
- Go to File -> Export -> Quick Export as PNG. Make sure to give your file a recognizable name, and take note of where you save it on your computer.
If you have a multicolor drawing
Example:

- In the selection step with the Color Range tool, don’t click the Invert check box.
- Then click on the image’s background to select the background:
- Adjust where you click and the fuzziness slider.
- When finished, press OK, and then delete background. Complete rest of steps using the same process.

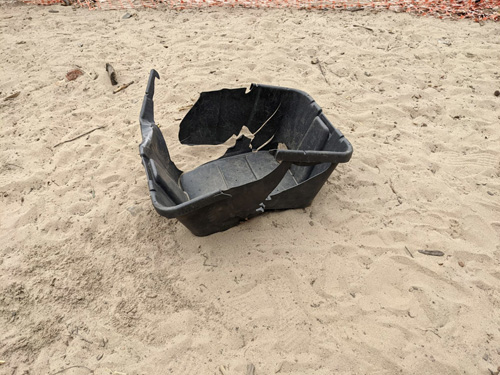
Cropping objects out of images
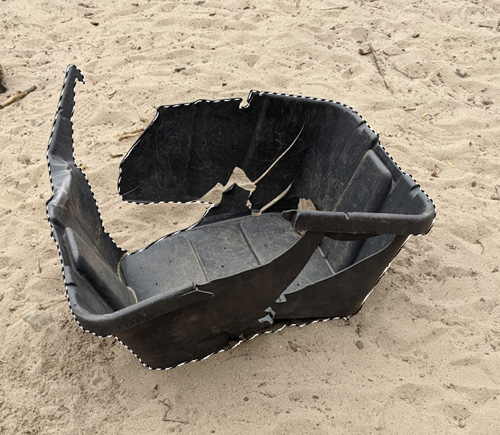
Example (it’s easiest if your object stands out from the background):
- Following same steps as above, double click background layer to turn into a regular layer:
Option 1: Using object selection tool
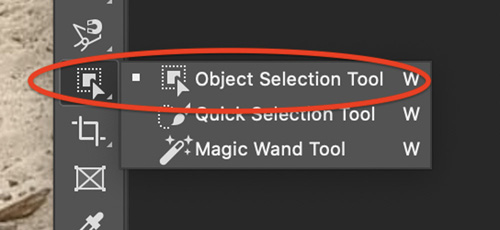
- Drag over the object and see if Photoshop selects what you want it to. In this case it did:
Option 2: Using Quick Selection Tool
- Adjust the brush size in this menu bar. Experiment so that brush is similar size, but a bit smaller than the shapes in your object
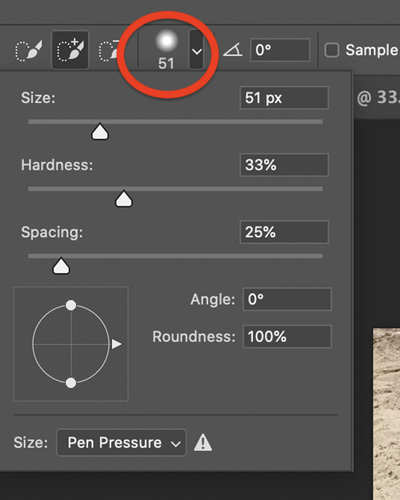
This is a good size to select the main portion of this object:
For smaller sections of object, you can make the selection brush smaller.
Removing from selected area
For example, if you select this sand area:
Press the option (or alt if you are on windows) key while selecting the areas you would like to remove from your selection.
Now: Once your finished making your selection
Now in the menubar go to Selection -> Inverse to select background. Delete the background to leaves transparency around the object:
Saving as a Transparent PNG
- In the menubar go to Image -> Image Size. Make your image about 1500 pixels in the maximum dimension.
- Go to File -> Export -> Quick Export as PNG. Make sure to give your file a recognizable name, and take note of where you save it on your computer.
Now add your transparent image into your project in Unity
To create a flat image with transparency
- Import your PNG into Unity
- Click the image asset. In the Inspector, change Texture type from Default to Sprite (2D or UI)
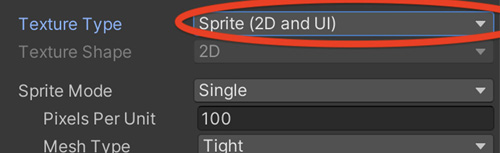
- When asked, hit ‘Apply’ to apply these settings
- Drag your PNG asset into the scene
- Move the asset using Move, Scale and Rotate Tools
Add 360-degree photos as skyboxes (backgrounds)
- Download Google Street view app on your phone
- Follow directions to creat create a new 360 photo
- Share photo privately, send to computer
- Reduce resolution to 2000 pixels wide
- Import into Unity, usually as a JPEG
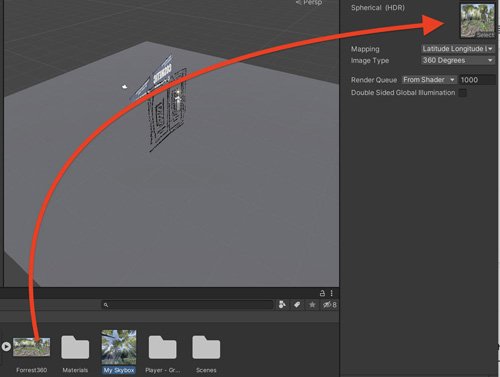
- Create new Material asset
- Click your asset. In the inspector set the shader to Skybox -> Panoramic Shader
- Drag your JPEG asset to the Sphereical HDR box in the inspector (with your new material still selected)
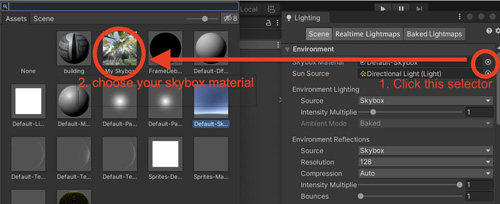
- From the Windows menu, Choose Rendering -> Lighting Settings
- Choose your skybox material:
Now the fun part
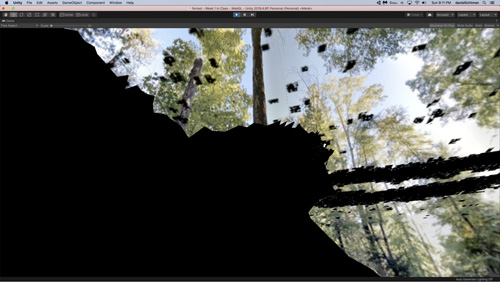
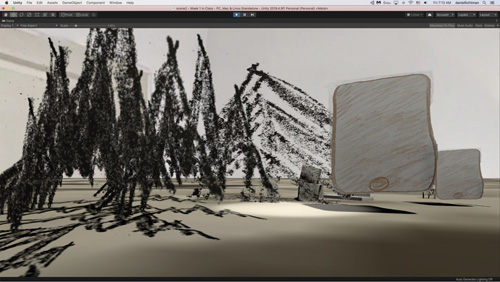
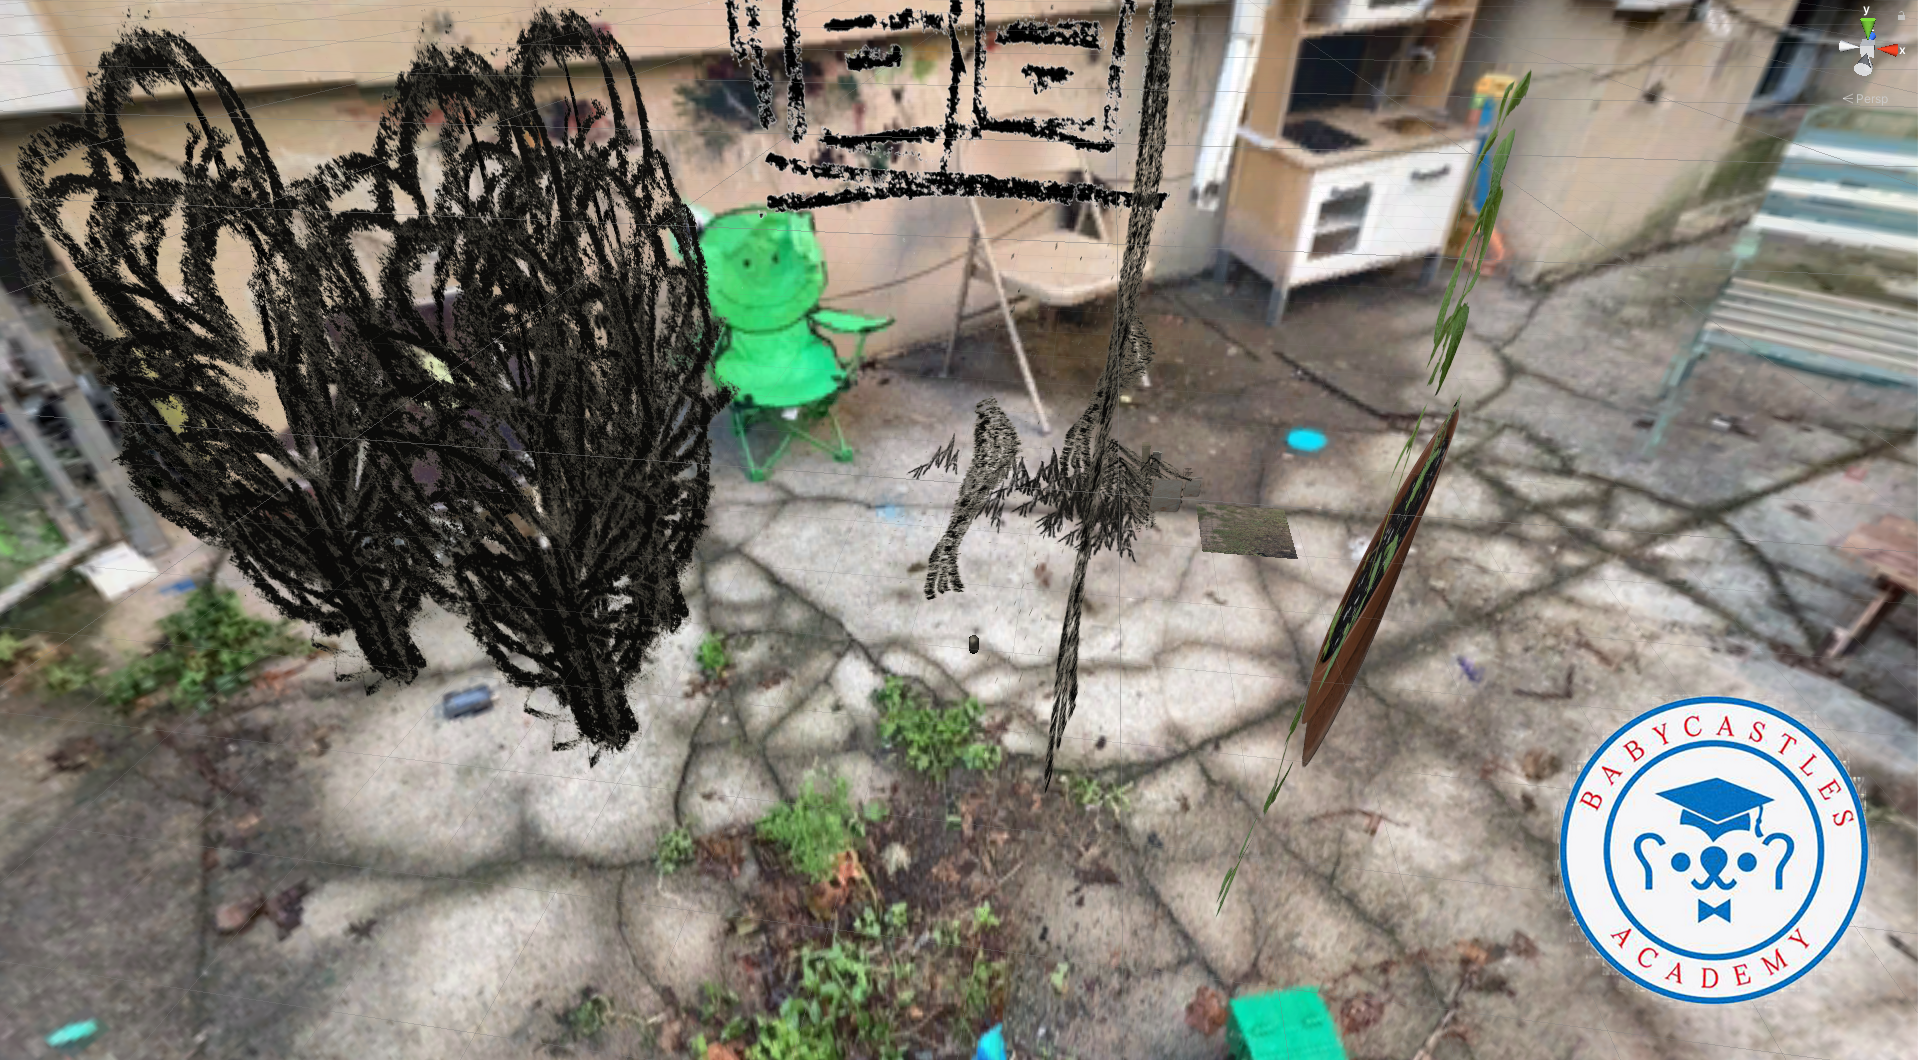
Create / import a lot of drawings and photo cut outs. Explore ways of positioning them in the scene -- a variety of angles, sizes and rotations is usually fun! Try out a variety of skyboxes.
Creating a player for your scene!
Get it setup
- Download player assets: https://drive.google.com/file/d/1kW4a9Tg29OgBMadLajBKmTrfATBigFGt/view?usp=sharing
- Drag the folder ‘Players’ into your project
- For a player that moves along a ground plane, drag Player - Grounded into your scene
- For a player that flies through space, drag Play - Flying into your scene
Try it out!
- Press the ‘play’ button, or press Cmd/Control-P
- Move the camera around with the mouse Move the player around with WASD or arrow keys
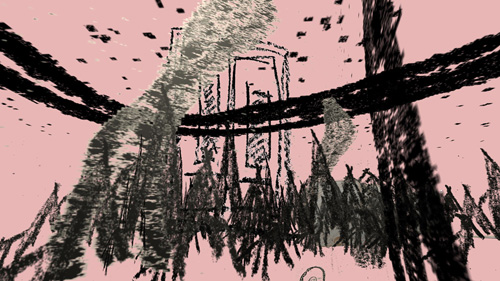
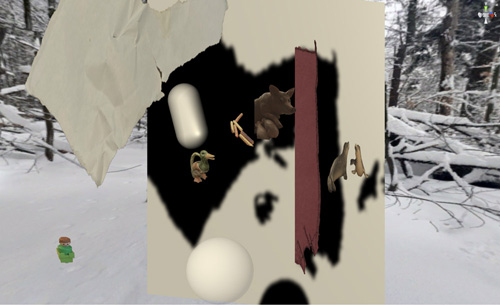
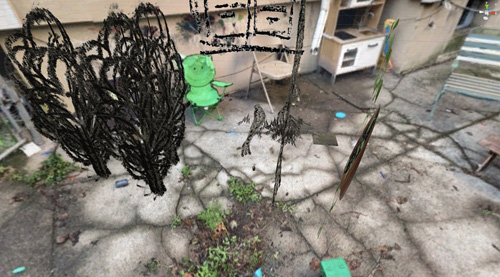
Example compositions with drawings and photos
From my project, The Raisin Truck Makes Raisins